Manual Installation
Manual installation on an individual or low production basis is accomplished as follows:
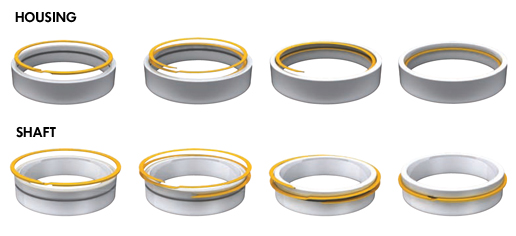
- Separate the ring coils and insert one end of the ring into the groove.
- Wind the ring by pressing down around the circumference until the entire ring is inserted into the groove.
Semi-Automated and Automated Installation
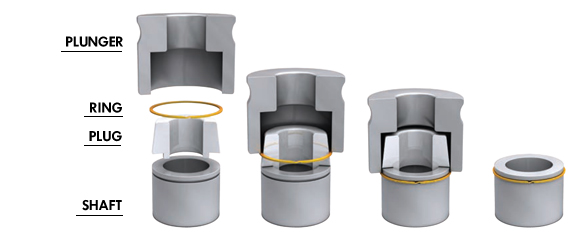
For higher speed and automated assembly operations, simple tooling or assembly fixtures can be designed. External installation on a shaft can be accomplished with a plunger and tapered plug. The plug, angled at approximately 6 degrees, is centered over the shaft end. A loose fitting plunger pushes the ring into position over the tapered plug. An arbor press or air cylinder is commonly used to automate this assembly operation.
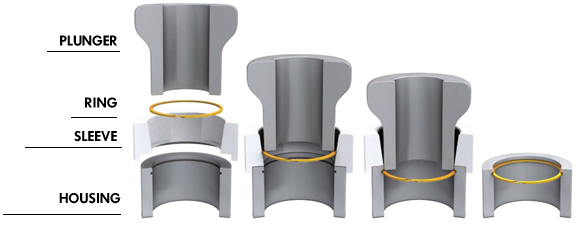
Internal retaining ring installation is accomplished in a similar manner. A tapered bore, which acts as a ring contracting guide, and a plunger pushes the retaining ring into position. Tooling for ring installation should have hardened working surfaces to minimize wear.
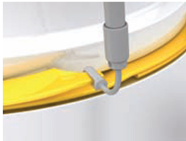
Removal
Smalley Retaining Rings are supplied standard with removal notches to
enable easy extraction from a groove. The notch is provided to form a
small gap between the ring end and the shaft or housing, permitting a
blunt object to be inserted at the end of the ring to pry the free end out
radially and up.
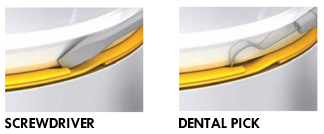
- Insert a screwdriver or dental pick behind the removal notch.
- Use the tool to pry out the first end of the ring.
- Manually spiral the ring around until it is free from the groove.
Smalley Tooling
Insert screwdriver and twist to remove end of ring.
Continue to spiral around circumference of the ring.
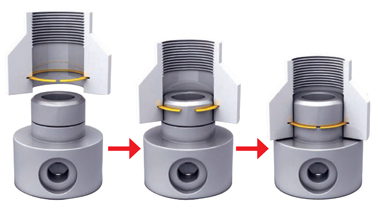
ID/OD Retaining Ring Lock
Spirolox Retaining Rings can operate in an internal and an external groove simultaneously. Spiral type retaining rings have many benefi ts for the ID/OD Lock, these bene fits include concealed fastening, no required assembly tooling and a 360° rotational capacity. With a Spirolox Retaining Ring, the application is tamper-proof and aesthetically pleasing.
In this featured application, the retaining ring is initially installed in the housing groove. When the mating component in the assembly is added, the retaining ring compresses into the groove. The groove is deep enough for the rings radial wall to fit into as the component slides into position. Finally, when the grooves meet, the retaining ring snaps into the shaft
groove (groove depth equals 1/2 the retaining rings radial wall) while still in the housing groove.


Ball bearing disc springs, Slotted and plain")